

star trails
“The stars are the land-marks of the universe”
Sir John Frederick William Herschel
Different methods
Long single exposure
This is the least used method although there is one particular advantage of doing it this way and that is that you will not get any potential gaps between the stars as may happen when using multiple exposures. However, there are problems when using this method. The main issues are cloud, battery and thermally induced noise.
Any cloud is going to stop the stars from showing and would therefore cause breaks in the trails so this would be defeating the object compared to multiple exposures. The longer the shutter is open the quicker the battery is going to be drained so there are going to be issues as to how long you can expose for. Also, with digital cameras the warmer the sensor gets the more noise (hot pixels and graininess) will be evident in the images. There are ways of getting around this such as camera coolers and using dark frames but his does add more complications.
Multiple short exposures
The majority of people use this method and then use a programme such as Photoshop or Starstax to blend the images together creating a star trail image. One of the advantages of using this method is that you can use the same data from a time lapse clip where the camera was stationary so it is possible to get double the amount of results from one set of data. As shorter exposures are used there is less stress on the battery and thermally induced noise is less of an issue as the sensor is not on for a extended period of time. The one disadvantage is that it is possible to get very slight gaps in the trail where there is an interval set in between each exposure to allow for the image to transfer to the memory card but, this can be taken care of using Starstax as it has a 'Gap filling' function in its processing algorithm. You can also have your star trails with 'comet tails' to add an extra effect using Starstax.

comet tails or not
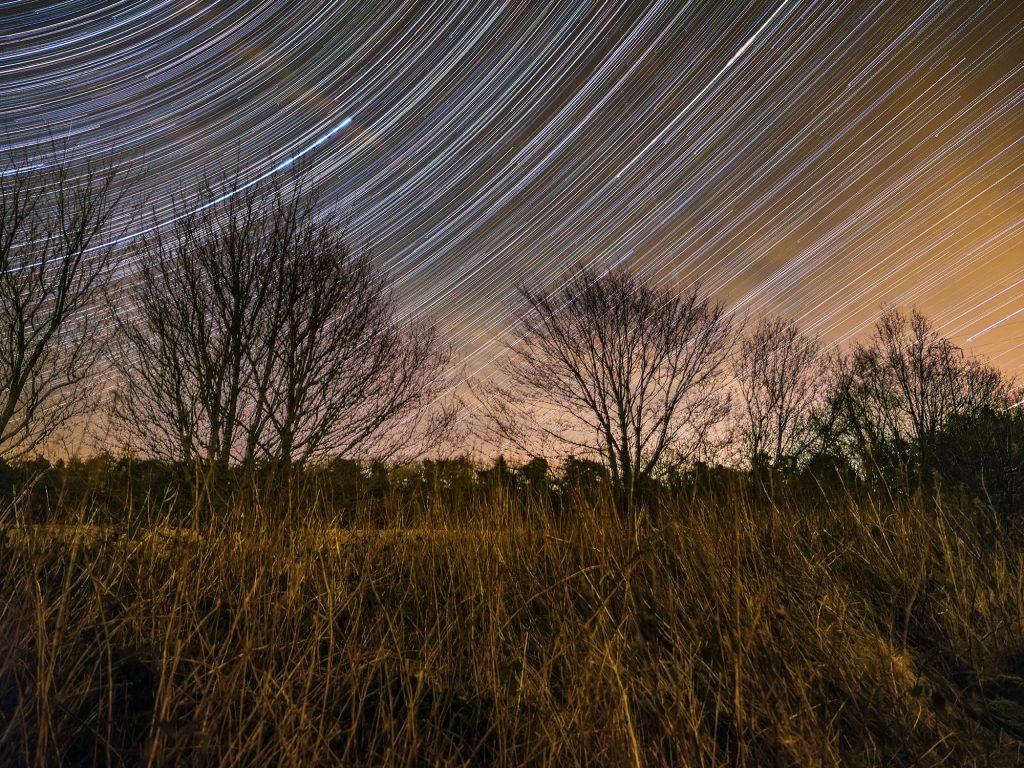
The background picture was created using the ‘comet tail’ facility in Starstax and this is one of a series of images processed in Starstax ready for an animated star trail (more on this later)
The image on the left is also from a series of images processed in Starstax ready for an animated star trail but his time ‘comet tail’ wasn’t used
photoshop
In order to create star trails from multiple images in Photoshop you need to open all the images into layers, the easiest way to do this is to use a free add on programme called Adobe Bridge, just open all the images in Adobe Bridge, make sure they are all selected, go to tools-Photoshop-open as layers, this will take you to photoshop with all the images in the layers section. Once you’ve done this select all the layers and for the blending mode select lighten and it will create a star trail image, all you need to then is to flatten the layers and you have your final picture for any post processing. As mentioned earlier there may be tiny gaps evident in the trails but you have to zoom in to really notice them.
starstax
Starstax does it differently, you open all the images in Starstax and then you have options for the blending mode, the common ones are lighten (as with Photoshop), gap filling and comet tail. The gap filling and comet tail facilities can be adjusted to suit. With Starstax you also have the facility to save each image after it stacks them so if you do this the first image will be image 1, the second will be image 1+2, the third will be image 1+2+3 and so on. The end result will be the first image with no star trailing and the last with full trailing, this is really useful and essential for creating animated star trails (more on this later)
getting more colour in your star trails
One of the issues with using data from a time lapse to do star trails is that the ISO is likely to have been quite high for the time lapse in order to show more stars and also more detail in the milky way and scenery. As a result of this the stars are potentially going to be over saturated and there is going to be a lot of them which may make your star trail look a bit crowded. To get more colour in your stars and also make the star trail look less crowded try using a lower ISO, for example 400-800 instead of possibly 6400-25,600 that is commonly used for time lapse. The thing to do is to experiment with the settings.