
"holy grail" time lapse"
“Darkness comes as sure as night follows day”
Anonymous
manual or automatic
When referring to “manual or automatic” in the case of doing a “Holy Grail” time lapse it refers to the method of altering the exposure settings during the time lapse sequence and not setting the camera to manual or automatic. The camera should still be set to manual. It is possible to do a rudimentary holy grail timelapse by setting the camera to automatic and just let it sort the exposure changes out itself but the end results will not be very good and will be very difficult to process into a smoothly transitioning video due to the erratic exposure changes made by the camera. Modern digital cameras are fairly good at doing automatic exposures during the day but not very good at night and they are also confused by sudden changes in light.
Typically, during a day to night and back to day holy grail time lapse there will need to be anything up to 150 exposure changes, these changes have to be made in 1/3 stop increments. The reason for this is to do with the software that is used to remove flicker and to iron out the jumps in light intensity during each exposure change, anything more than 1/3 of a stop will cause problems.
There are two ways of managing these exposure changes, remembering that there are three things that can be adjusted that will affect the exposure – shutter speed, aperture and ISO. You can adjust them manually or use an auto ramping intervalometer.

Manually changing the exposure settings
There are a lot of people who do this and they produce very good results, but it is not for the faint hearted. The problems that you have are that you are going to be doing this frequently during the night, ie every 20 minutes or less, in the dark, you need to be very familiar with how everything works on the camera, you have to examine the histogram to know when to change the exposure and to make things worse you have to touch the camera. In order to make the changes you are going to have to temporarily pause the time lapse, check the histogram, make the exposure changes and then restart the time lapse so you may lose a couple of frames during this process. More importantly, the risk is that you may inadvertently move the camera a fraction which may show up in the resulting time lapse clip. Doing it manually like this means that you will have to remain awake and alert and don't accidentally bump the camera or tripod while you are making the exposure changes
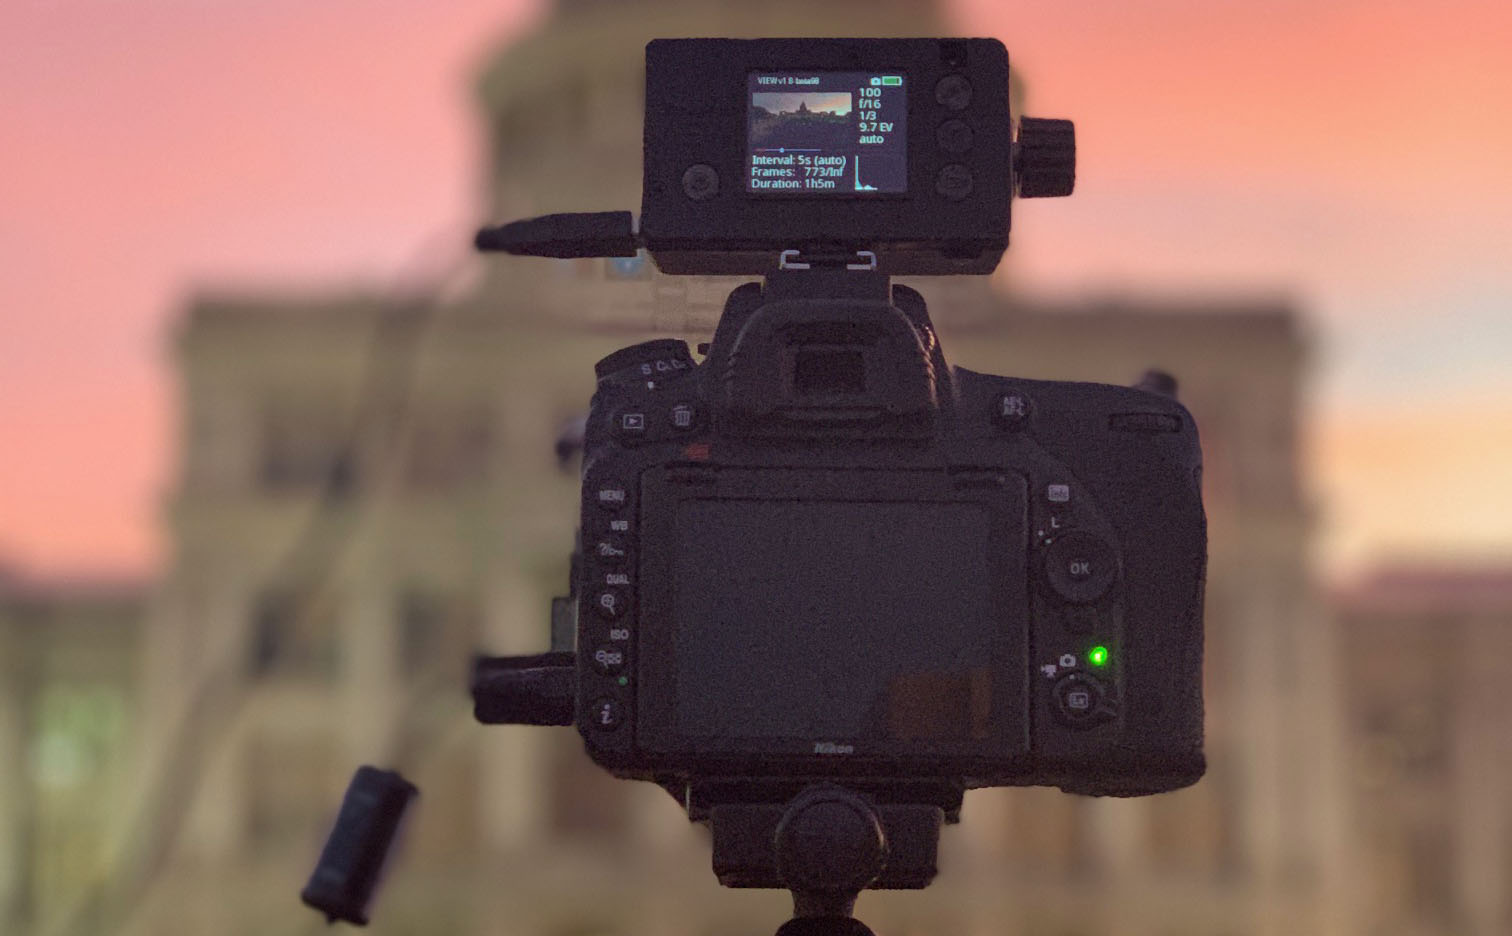
Auto-Ramping Intervalometer
The other option is using an auto-ramping intervalometer. This dedicated device will sort out all the exposure changes during the night and day and will adjust the changes in 1/3 stop increments during both transitions, ie day to night and night to day. It is used like any other intervalometer except that it has a light sensor built in. It requires some settings to be made and the most important one is that it has a correctly exposed picture that you must first take for it to work from, after this you set the day time interval ie how often you want a picture taking and a night time interval. You set the aperture that you are using, the maximum exposure time that you want, eg 30 seconds and the maximum ISO you want, eg 6400. It is also possible to have it adjust the aperture as well but you must use a lens that has auto aperture on it to do this. There are other optional settings such as preserving the highlights and you can set it to adjust the order in which it changes the shutter, aperture, ISO, etc.
Ironing out the changes
When the exposure changes there will be a noticeable change in light levels as it goes from one frame to the next even though the change is only 1/3 of a stop. This will give a juttering appearance in the end result unless it is taken care of in processing
processing options
There are two main options for dealing with the exposure changes and potential flicker, they both work hand in hand with Adobe Lightroom but have different interfaces and the way in which they work and their functions. However, they both work around the same principal and that is the use of “Key Frames”. They are ‘LR Time lapse’ and ‘Studio’ by Timelapse +view. Both available for purchase although the one that I use, ‘Studio’ is available free if you have a Timelapse +view intervalometer and have registered it. The other difference is that LR Time Lapse is a standalone programme whereas Studio is a plugin for Lightroom although Studio can also be used on manually made holy grail clips as well. LR Time Lapse costs £267 for the pro version which has all the functions while Studio costs £79 or free if you have the Timelapse +view intervalometer
LR Time Lapse
I’m not going to dwell on the way LR Time Lapse works or its workflow as I haven’t used it apart from to say that, like Studio, it uses key frames and a ‘de-flicker’ tool to iron out the exposure changes made during the time lapse sequence. It does involve a bit of swapping between Lightroom and back and it has a steeper learning curve than Studio. There are plenty of tutorial videos available on YouTube. The other very important thing when using LR Time Lapse is that you have to have the ‘XMP’ files as well as the RAW files when processing.
Studio
Studio is a plugin that works in Lightroom. Once all the RAW files are loaded you go to the plugin and there are four stages, 1. Group photos by time lapse, 2. Auto create key frames, 3. Blend settings between key frames and 4. Preview time lapse. Clicking the first stage will register the sequence as a time lapse, clicking the second stage will create some key frames from the sequence. After this stage you process the key frames in turn copying the workflow to each subsequent key frame before making any extra adjustments. Clicking the third stage will blend these adjustments across all the frames so the changes will be smoothly transitioned, finally you can preview the time lapse before exporting it. I find this method works really well and takes a lot of the hassle out of the equation. Both of the examples in the background panels on this page were processed using this method.